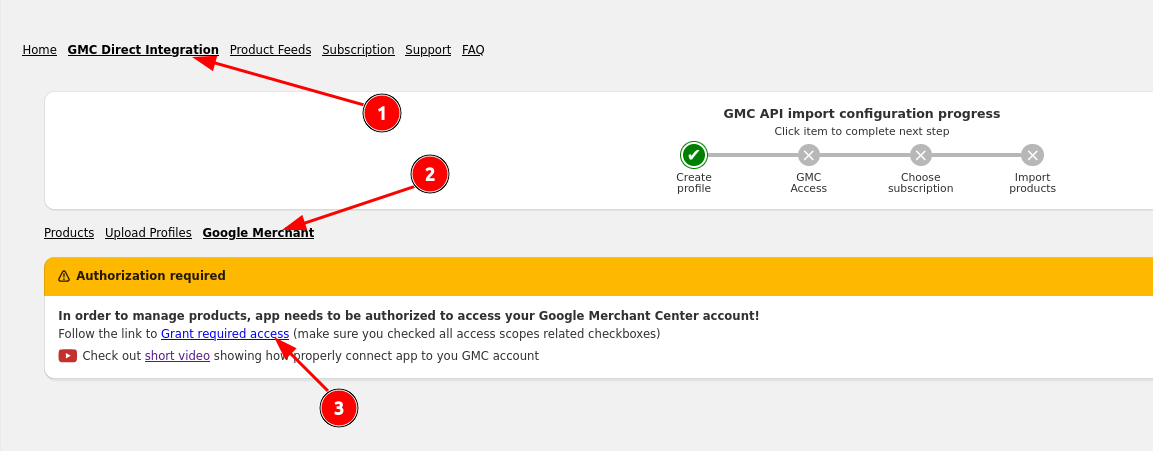
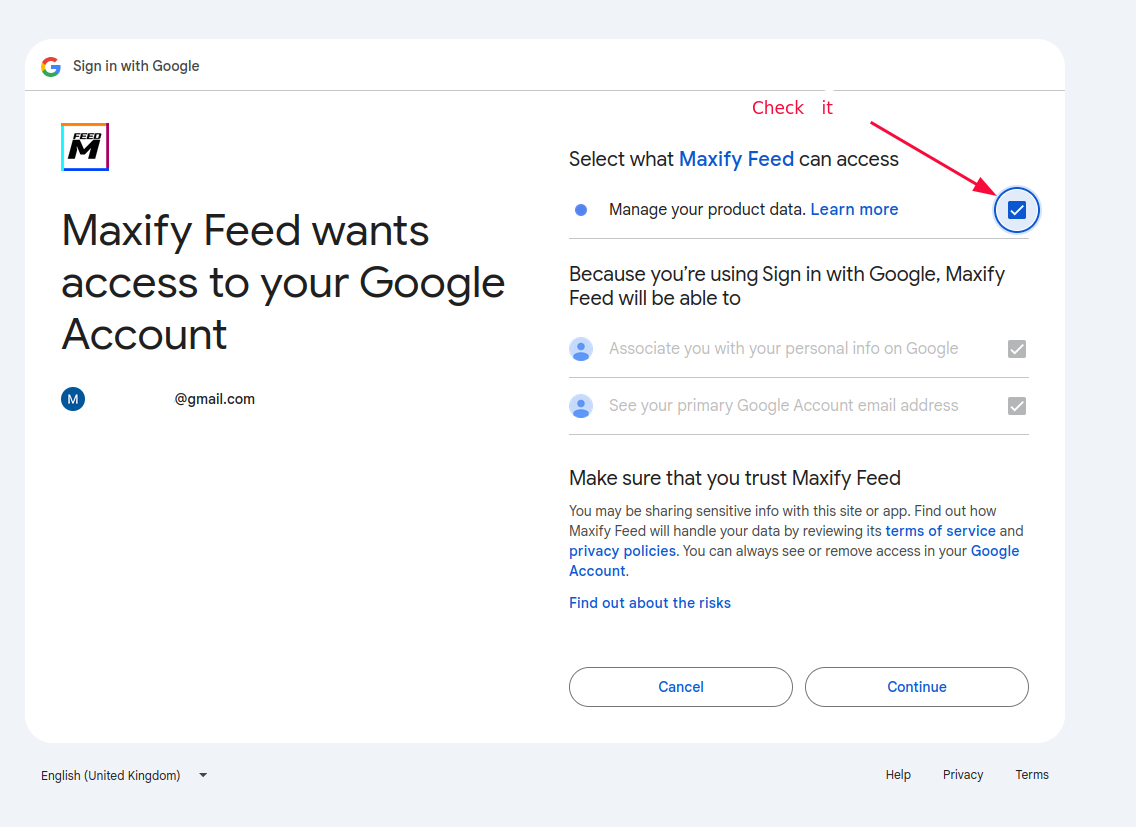
The initial step in setting up your feed is granting the app permission to add products to your Google Merchant Center listing. To do this, select the “Grant needed access” option under the GMC Direct Integration > Google Merchant tab (Figure 1). This will redirect you to the Google OAuth 2 page. Follow the steps, and don’t forget to check the final checkbox to authorize the app to manage product data (Figure 2).
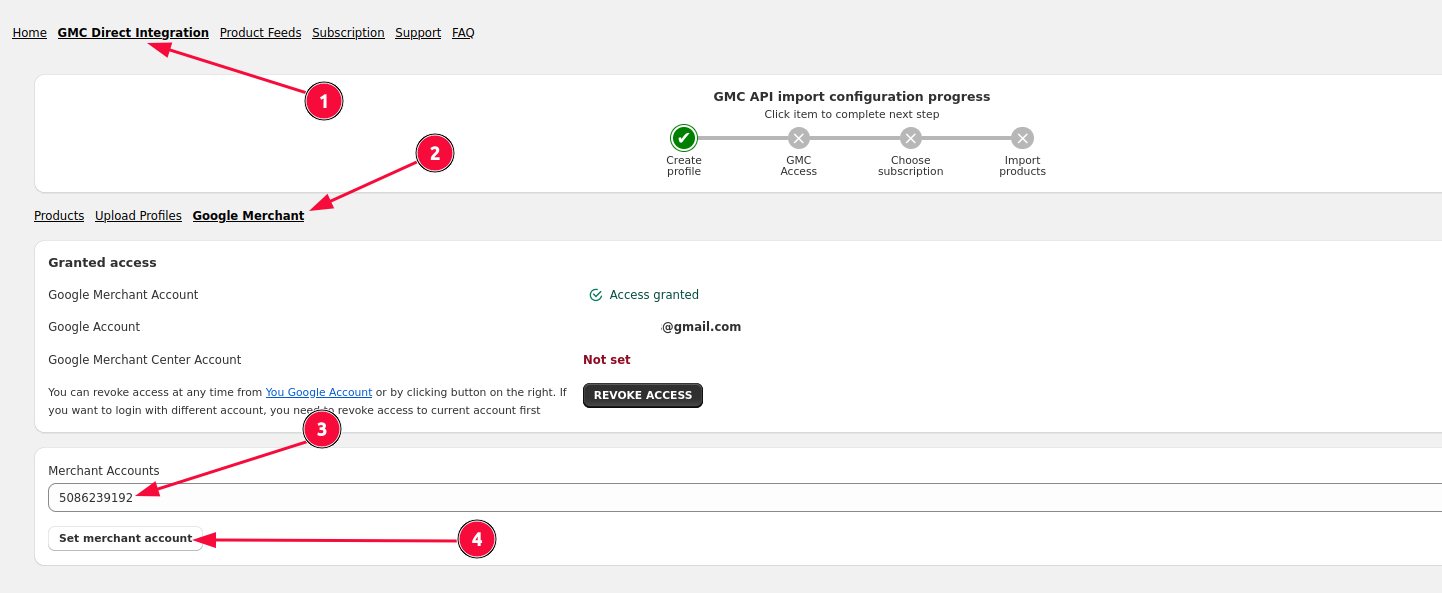
After being redirected back, choose the merchant account you wish to use from the drop-down menu and click the “Set merchant account” button under the GMC Direct Integration > Google Merchant tab (Figure 3).
The next step is to create a feed template. Simply go to the GMC Direct Integration > Upload Profiles tab and click the “Create new” button.
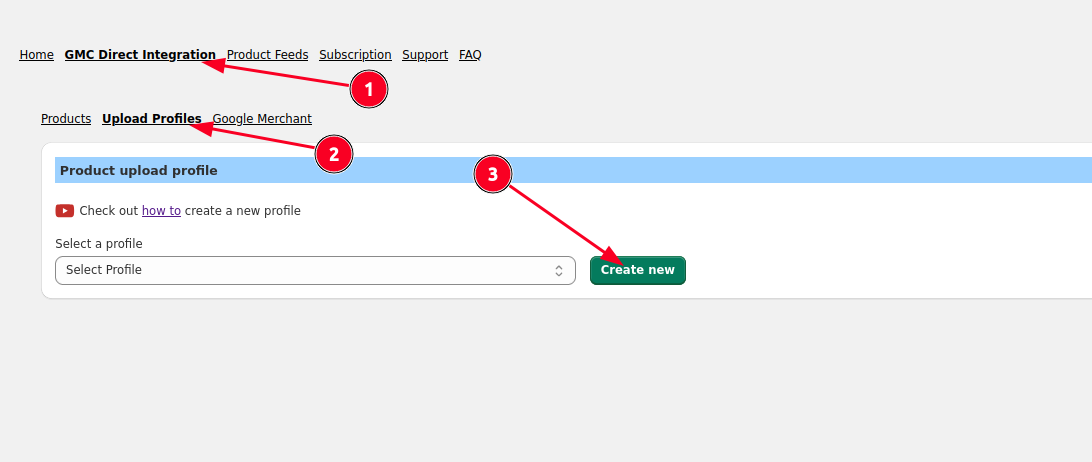
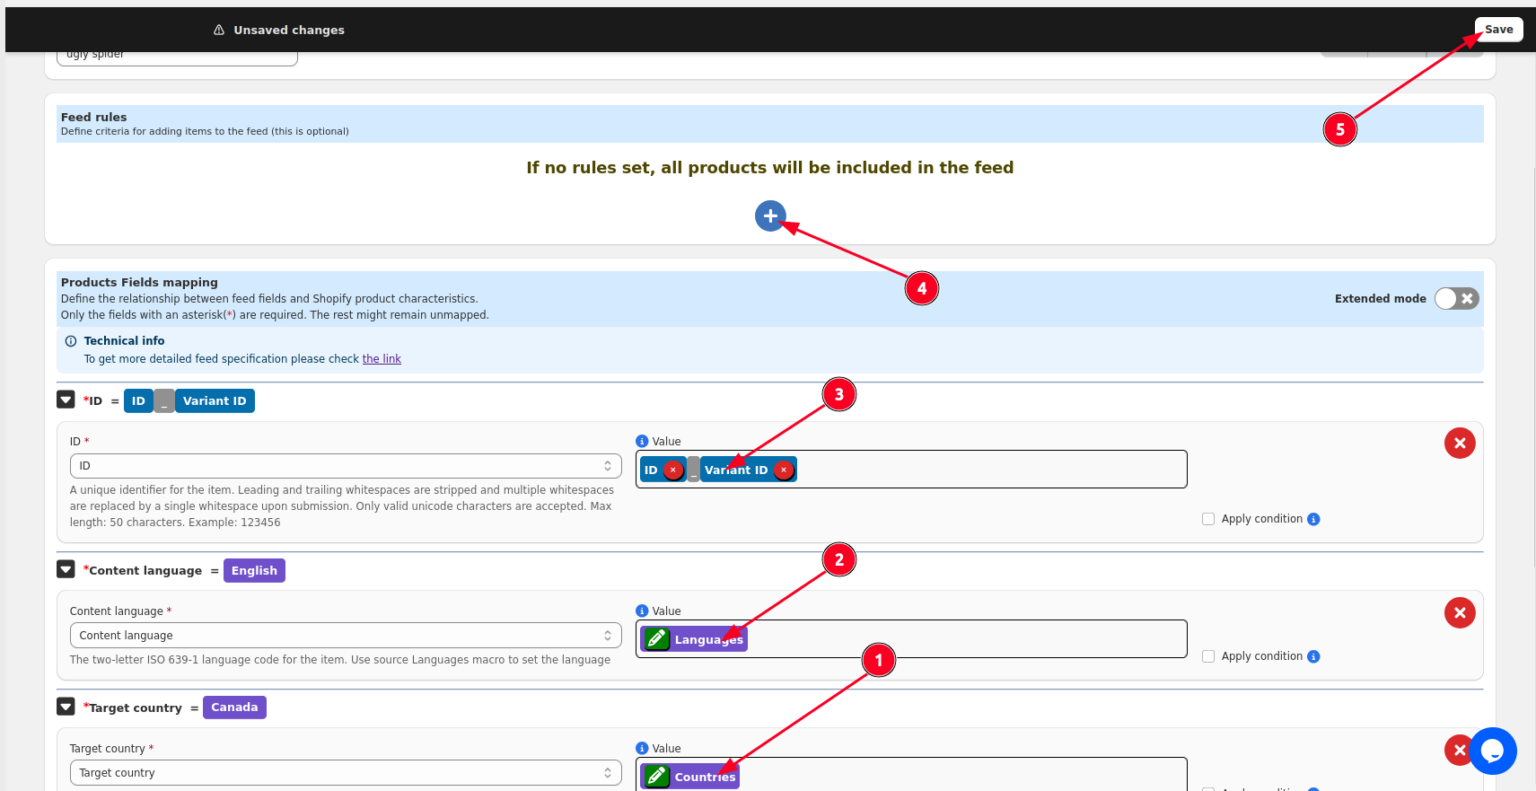
The following are the steps to configure the feed template once it has been created (Figure 5):
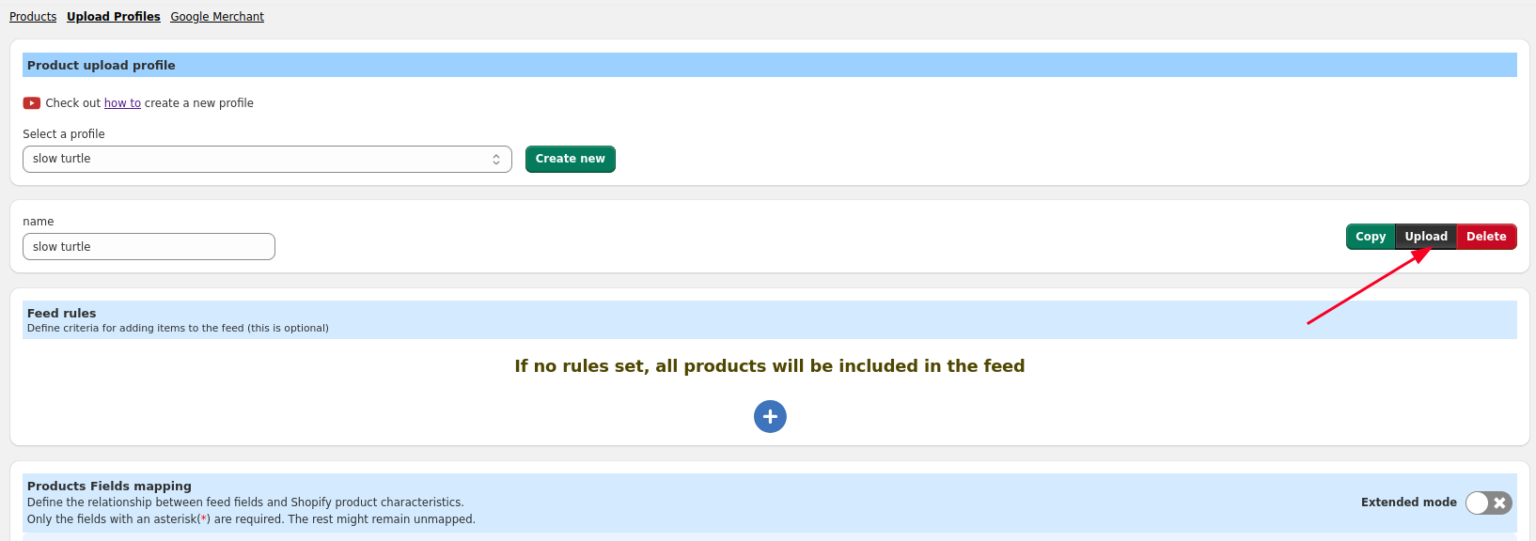
After template has been saved, click Upload button (Figure 6) to start process of exporting products to Google product listing.
Once a profile has been used to export products, any modifications that impact exported products—such as altering profile values or rules—will cause your Google listing’s products to automatically adjust. Additionally, modifications made to products on Shopify side will also affect products listed on Google.
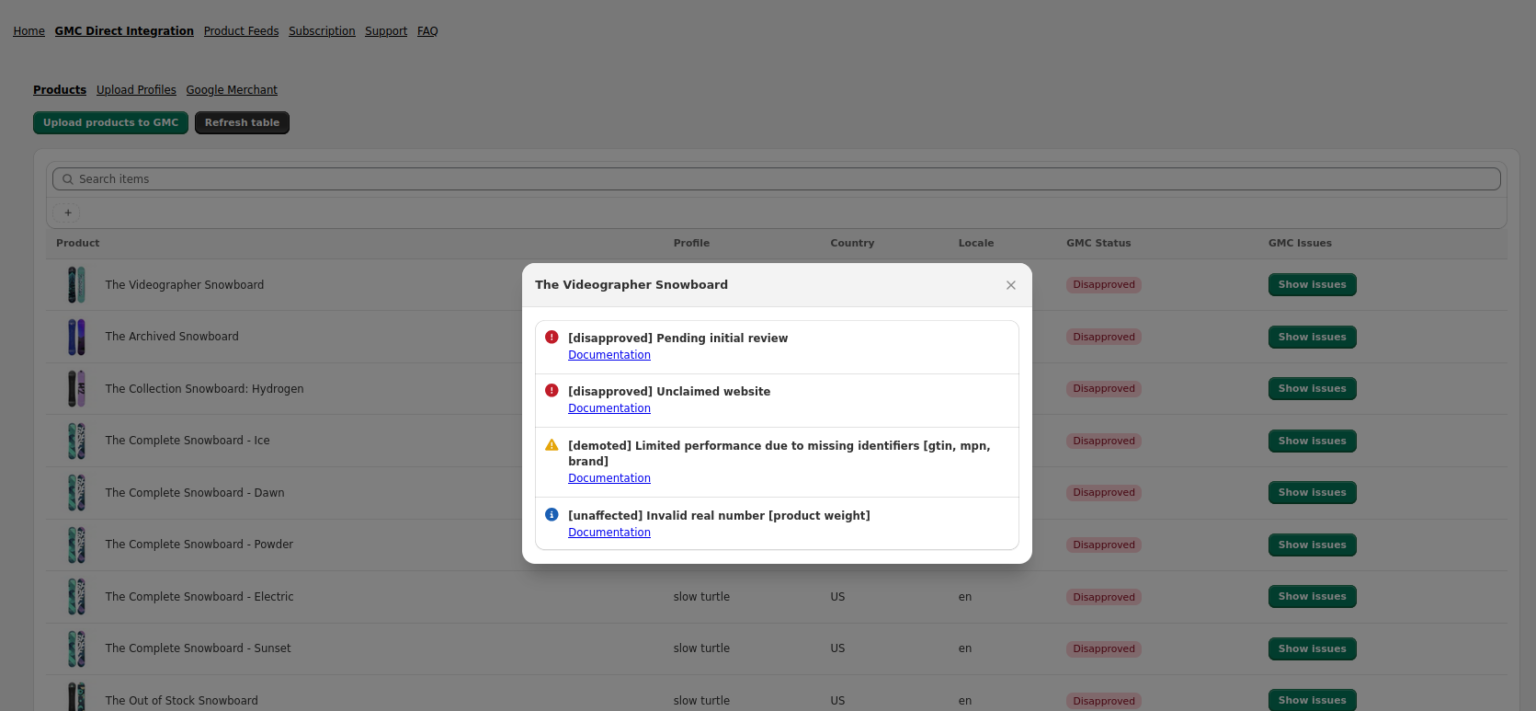
Go to the GMC Direct Integration > Products tab to view the list of uploaded products along with their statuses (Figure 7). To view a comprehensive status report, select the Show Issues option for the relevant product.
© 2016-2025